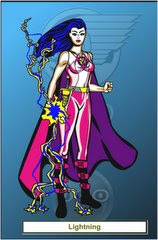
Click on Hero machine, version 2.5
Choose a pose for your hero to start with.
After choosing a pose click on the drop down box that says pose and another box will appear that says pose loading options.
Click on complete.
Then choose the features and accessories for your hero, e.g. hair, mask, cloak etc. You can be as creative as you like with styles and colours.
Type in the box that says character name, underneath the picture of your character and give them a name.
To save your character if you haven't finished, click on the tab that says save.
Copy the text that appears in the box and save it in a Microsoft Word document. Then next time you log in, go to the hero website and click on the tab that says load (next to the save tab) and copy the text from the Word document into the box.
To save your character once you have finished- Press print screen (its the button on your keyboard- top right), then go into Microsoft Office Word/Picture Manager and click on paste.
Crop the picture by clicking edit picture (top of page) and then click on crop (right of page). Adjust the image to the desired size and when you are happy click file, then save as and save it on the P drive in your class folder.
Upload it just as you would a photo (If using Picture manager, look under how to... if you don't know how to do this).
If saving in Word just write the blog underneath and then you can transfer to picture manager later!Don't forget to make your blog exciting!!!!
No comments:
Post a Comment